Everyone and their granny has a ‘zero-parts’ EPROM, EEPROM or Flash programmer design. Well, I got mine. A Flash RAM programmer is going to be a necessity as the CFT project acquires speed, and I'd rather make my own tools than buy them at exorbitant prices. I need to program certain types of parts only (namely 4-MBit Flash RAMs), and wanted to use what I had handy, so the implementation reflects this.
The programmer uses an AVR Atmega-8 microcontroller, three 74164 ICs and a handful of passive components.
The hardware design was inspired by Jay Kominek's Parallel port EEPROM programmer — the description of which is no longer accessible but it was picked up and described by Hackaday. Since parallel ports are becoming rare, I embellished the design by using an AVR Atmega-8 microcontroller to do the hard work, and an FTDI USB-to-serial cable to take care of communications and supplying power. I made sure that all of the expensive components (the FTDI cable and ZIF socket) are removable so I can reuse them for other projects.
For now, this is a fairly specialised little device, but I may add more functionality to the schematics, and will certainly add to the hardware itself as I need more functions.
Compatibility
The device is very generic, and can program any parallel-programmed EPROM-like device. However, the current schematic drawing makes some assumptions.
Compatible Parts
Since I designed this primarily for me, the compatibility is fairly limited at the moment since only a handful of parts make financial sense in 20111. The Zero Insertion Force socket is wired for '010, '020 and '040 EPROM, EEPROM and Flash RAM pinouts. Since this is all I use, there's no need for jumpers to reconfigure the ZIF socket.
Programming Voltage
The schematic does not allow for a separate VPP input to the socket because I'm programming 5V-only devices. Feel free to add one yourself to the appropriate pin. If the VPP is anything other than 5V, you'll obviously have to source the voltage in some way. The standard way with self-built EPROM and EEPROM programmers is putting a power jack (or terminals) on the board and using a bench power supply to provide the exotic voltages needed.
Theory of Operation
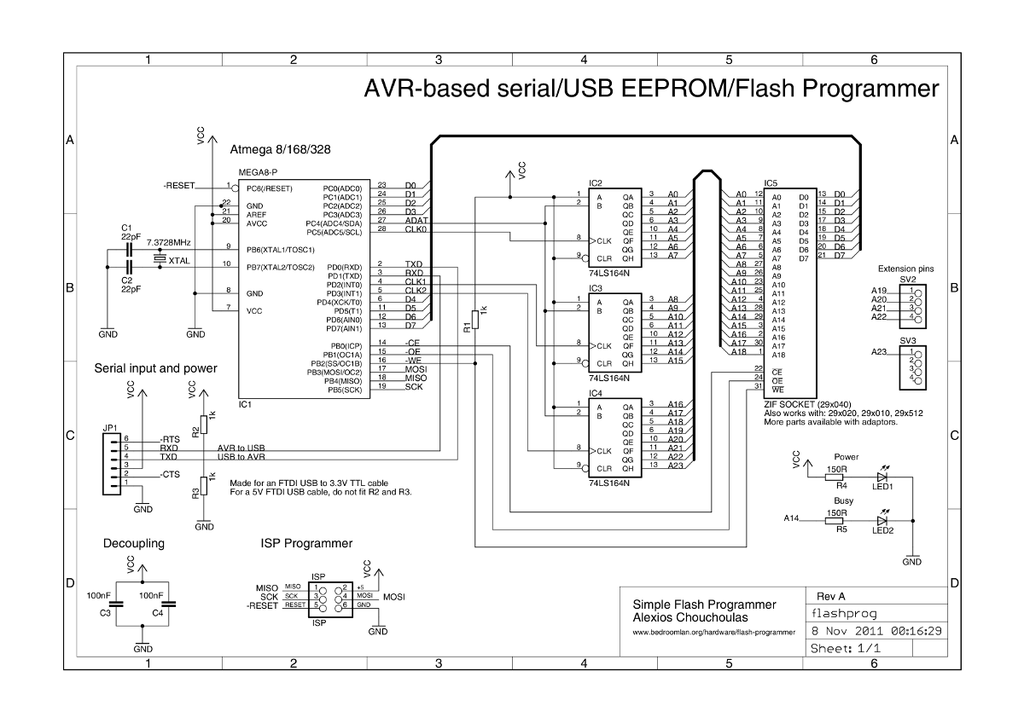
The programmer works by using three 74x164 serial-in-parallel-out shift registers to buffer the address pins of the EPROM/EEPROM/Flash chip, and using eight pins on the Atmega for the data. Each 74164 outputs 8 bits of address data, for a total of 24 bits, which is more than I need. The 74164 uses a dual A-B input (which is ANDed to provide input to the shift register), a clock input, and a clear input. Clear is permanently tied to VCC to disable the signal. The clock input of each 74164 is driven by a separate pin on the Atmega. The B ports of all registers are driven together by a single pin on the microcontroller. The A ports are all tied to VCC permanently. This way, the Atmega can set the B port and then strobe one of the clock outputs to control a single shift register. Using appropriate code, all three registers can be updated rapidly. The firmware maintains the current value of each register, and avoids resending it if it hasn't changed. So, when programming sequentially, only the least significant register is updated all the time. The second register is updated once every 256 bytes, and the third and most significant one is updated once every 64k.
The memory chip's data bus is split into two nybbles and connected directly to eight pins on two different ports of the microcontroller. The signals are split because as configured, the Atmega8 didn't have an entire 8-bit port easily accessible. The microcontroller can configure these pins as inputs or outputs, and so both read from and write to the memory part. To avoid shorts and other nasties and (probably — I don't care to put it to the test) to allow hot-swapping of the memory chips, the data bus spends all its idle time floating (configured as input), and is only driven when a write is in place.
Chip control signals CE, OE and WE are also directly wired to the microcontroller for easier access. For safety, WE is also pulled up with a 1kΩ resistor. Since AVR microcontrollers boot with their pins configured as inputs, we need the pull up resistor to make sure WE is high, and writing is disabled. The only downside of this design is that there are no interlocks: you could modify the firmware to assert all of these signals simultaneously, which would confuse the memory chip.
For communications accuracy, the Atmega is clocked externally using a 7.3728 MHz crystal. This is a good rate for serial communications, and allows us to reach speeds of up to 460,800 bps. The FTDI serial-to-USB chip is very happy to deal with such transfer rates and the whole chain works flawlessly. You could run the Atmega with different crystals, or use its internal R-C oscillator (don't forget to set the appropriate fuses), but this would severely limit your data rates, and introduce serial communication errors.
For status indication, a power LED and an activity LED are provided. The activity LED is wired to signal A14 of the ZIF socket. I did this so it would blink while reading or writing. Unfortunately, the device reads and writes too quickly for the blinking to be evident at 460,800 bps. At lower speeds, A14 might be enough. Alternatively, you could connect it to A15 or A16. The firmware blinks the LED (by modifying the address on the shift registers) at appropriate points to indicate activity.

Schematic drawing of the programmer's hardware.

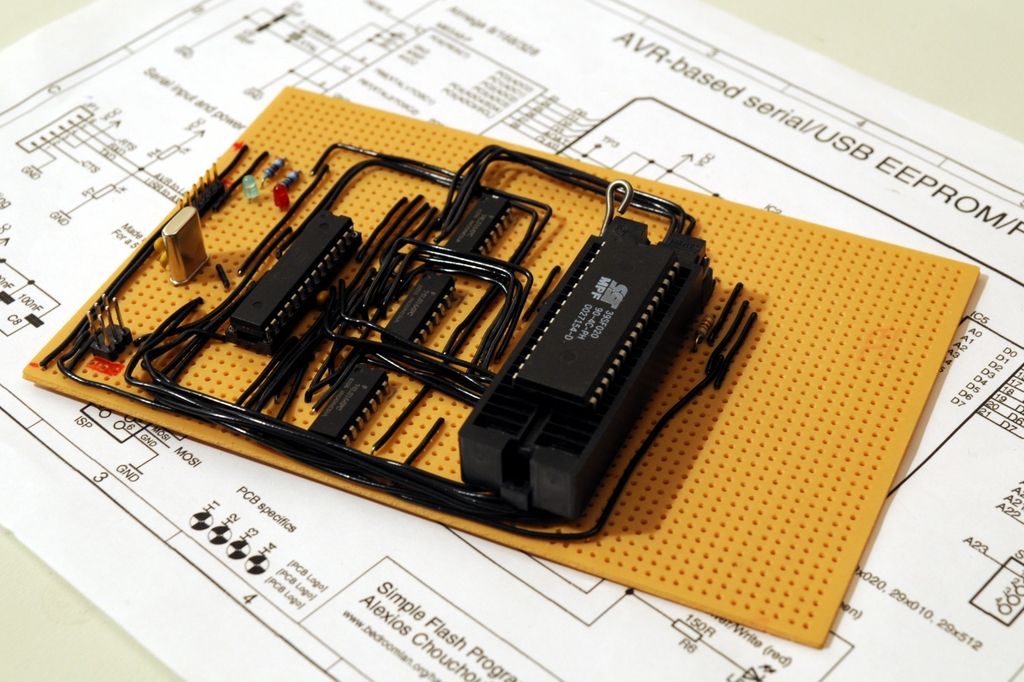
The prototype programmer built on Veroboard/Stripboard.

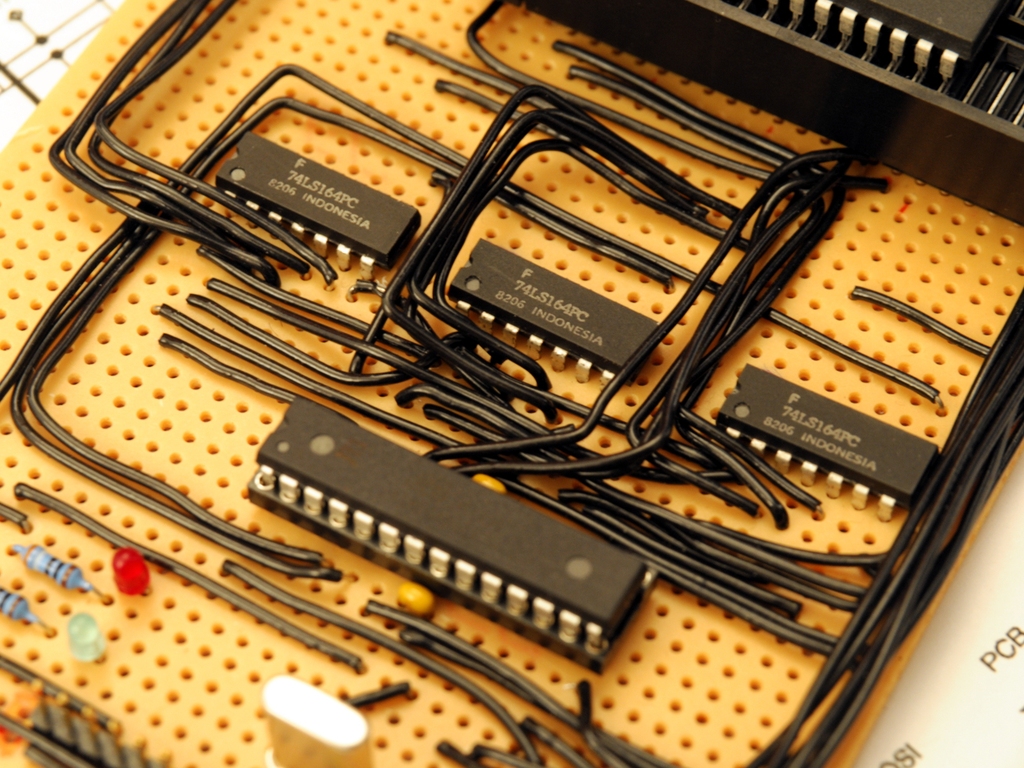
Some of the parts in my stock have an impressive pedigree. These 74164 shift registers were made in early 1982!
Software
The control software allows for a modest amount of human interactivity, although you'll need a microcontroller with more than 8K of Flash RAM for a better feature set. The interaction is a little bit like a Hayes-style modem (you know, the type with the AT commands). Of course, this isn't quite enough for practical use.
A Python program, flashprog, takes care of the computer-side of things. It allows you to read, write, verify and erase memory chips. The Python program (and some of the microcontroller firmware) were written to cover my own needs, so there are absolutely no guarantees the software will work for parts other than the ones I have handy. I will update the software and firmware as I get my hands on more parts I need to program.
Both the software and hardware are provided under the terms of the GNU Public License (GPL).
Download
You can find everything here, including Eagle schematics, firmware, source for the firmware, and the flashprog program.
